Sometimes being online can be a big pain-in-the-ass. Every site wants you to have a user name and password. You know you shouldn’t use an easy-to-guess password and that you should have a different password for each site – but chances are – you’ve used the same password (or some slight variation) on most of your accounts because… well… just because you’re human.
- I’ve heard every excuse in the book (and have used them myself for the longest time)
- “I don’t have the time to re-enter all my password data”
- “It’s really going to be a hassle – it’s not worth it”
- “Password managers are too expensive”
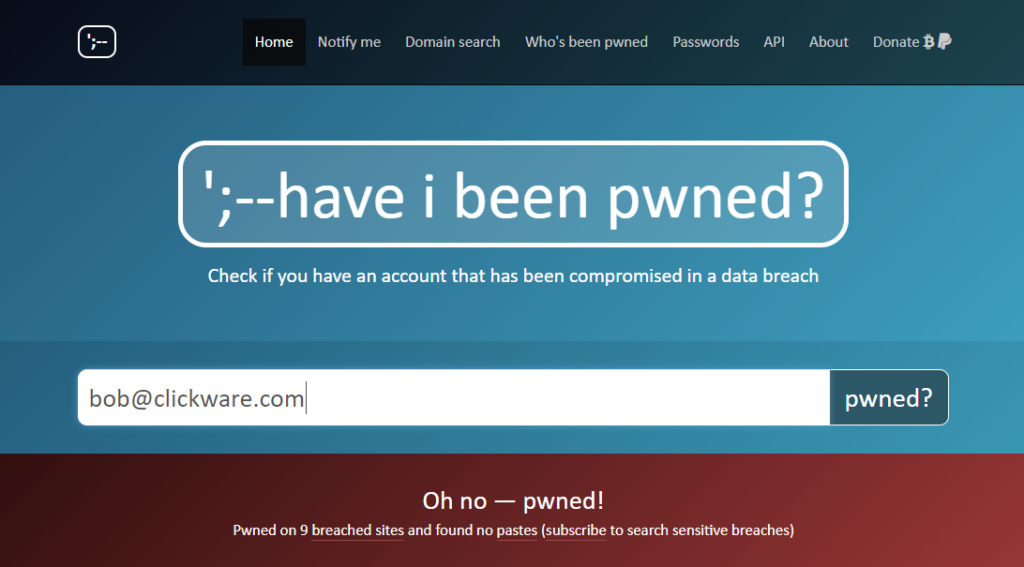
Well – as we all know – data breaches happen almost every single day. There have been so many data leaks of personal information – it’s almost not funny. Here’s one way you can do a check to see if your email address(es) have been exposed in one or more data breaches: Have I been Pwned.
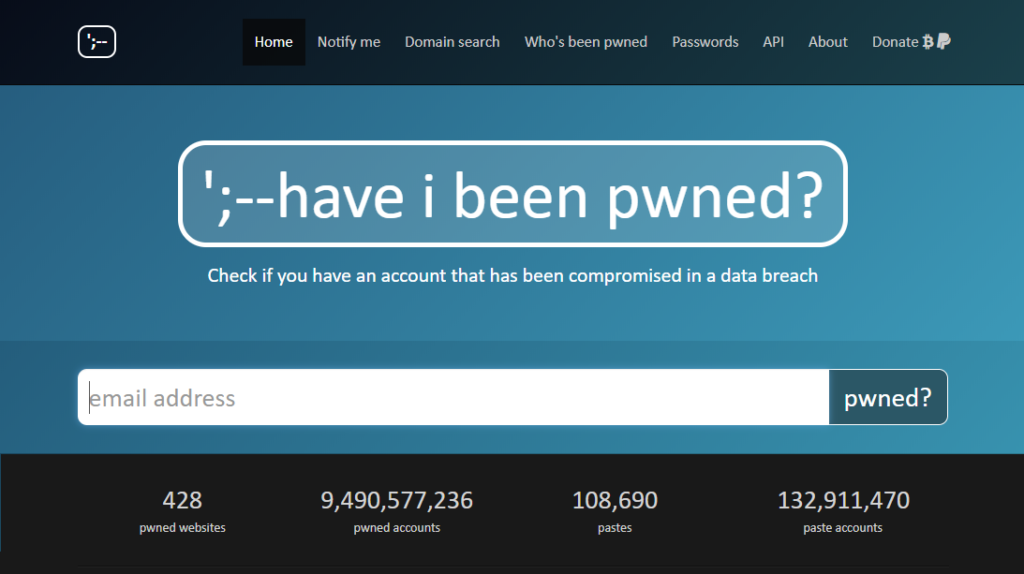
You simply enter your email address and it will check over 9 billion breached accounts to see if your email address shows up:
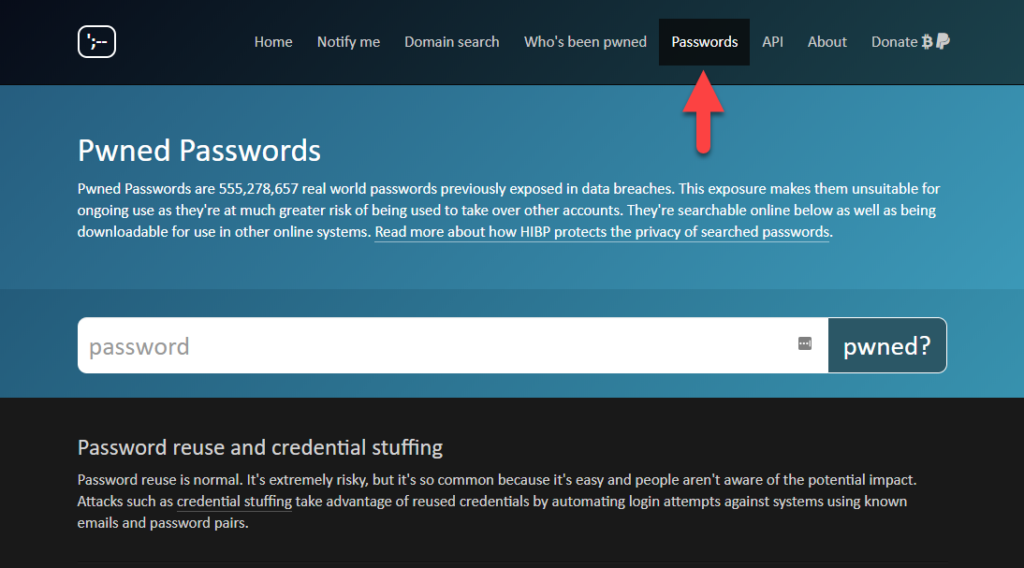
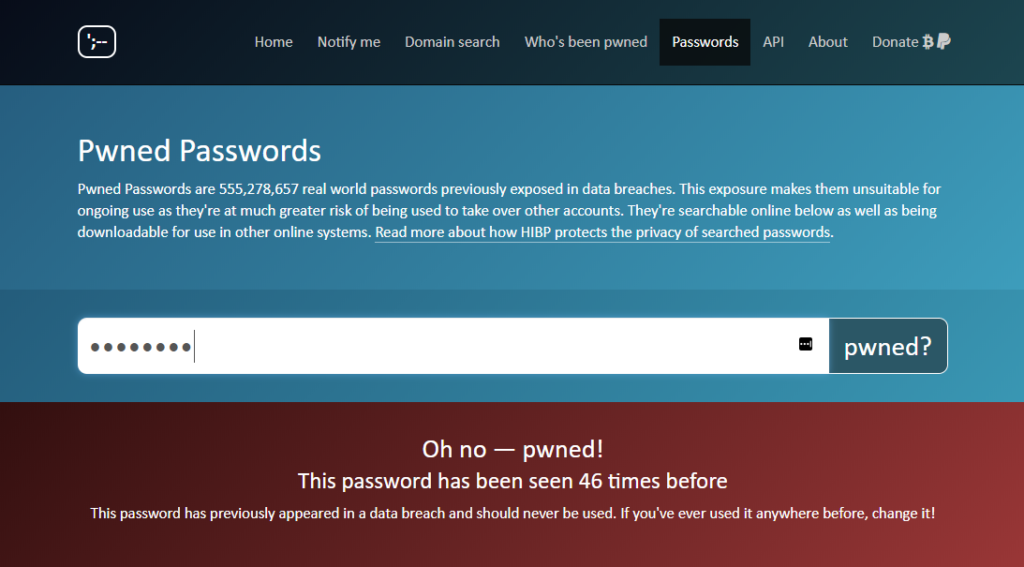
While you’re on the site – you should also check that very weak password that you have re-used among a bunch of different sites – to see if it has been compromised as well:
OK – so, hopefully, I have your attention! NOW – let’s take some action and fix it!
There are a number of password managers out there – Lastpass, Dashlane, and 1Password are the three that I would recommend. Here’s how they stack up:
| LastPass | Dashlane | 1Password | |
| Cost | FREE Premium @ $3/mo Family @ $4/mo | FREE Premium @ $5/mo Premium Plus @$10/mo | Individual @ $3/mo Family @ $5/mo |
| Strong password generation | Yes | Yes | Yes |
| Breach Alerts | Yes | Yes | Yes |
| Family Account Option | Yes | Yes | No |
| Secure Password Sharing | Yes | Yes | Yes |
| Mobile App | Andriod, iOS, Windows | Android & iOS | Andriod, iOS, Windows |
| Desktop App | Mac, Windows, Linux | Mac & Windows | Mac & Windows |
| Browser Extensions | Chrome, Firefox, Safari, Internet Explorer, Edge, Opera | Chrome, Firefox, Safari, Internet Explorer, Edge, Opera | Chrome, Firefox, Safari, Edge, Opera |
At the end of the day – I chose LastPass because:
- They had a free account option that I could try out (and upgrade later)
- They were the least expensive
- They supported all the platforms I use
- They supported all the browsers I use (and test in)
- They have a family plan for an affordable price (so I can encourage all of them to stop using the same password everywhere!)
Regardless of the password manager you choose – the steps are similar in each case. For the sake of this article – I’m going to show you how to set up LastPass (because that’s the password manager that I use).
Step 1 – Setup Your Account
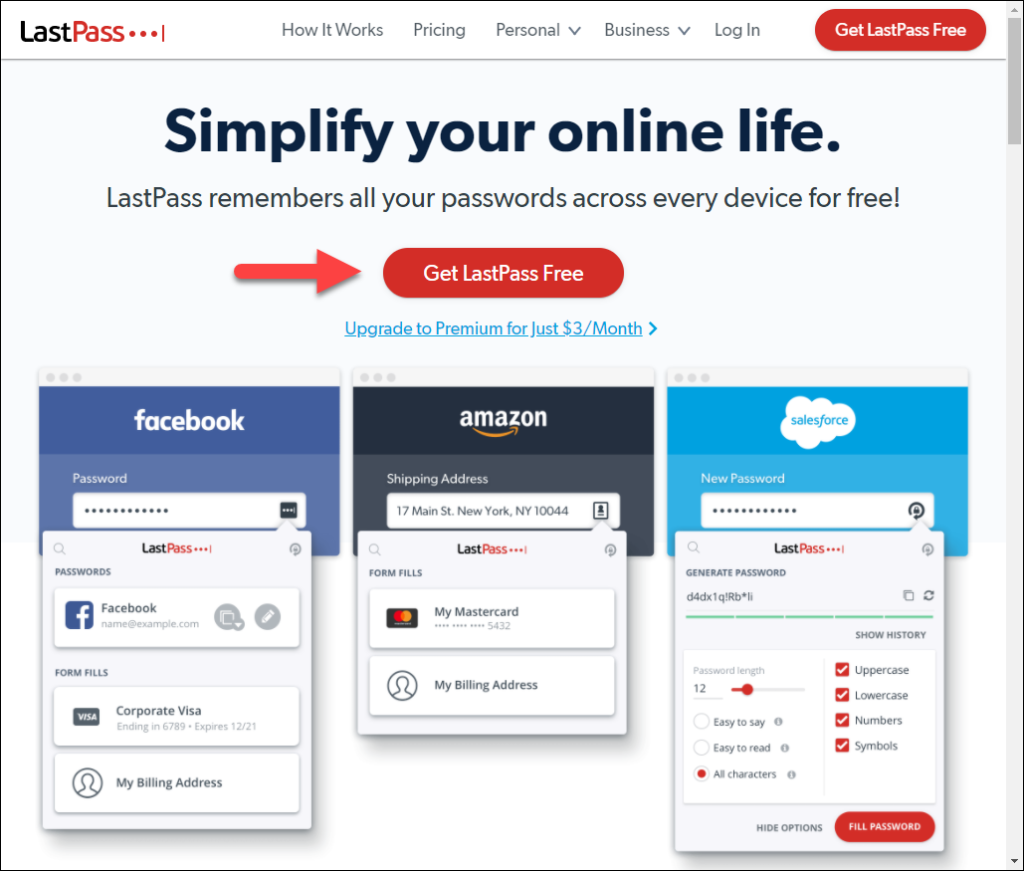
Go to LastPass.com and set up your account (you can just use the free version to start – and then upgrade to the family plan later – or just start with the family plan from the get-go – the set up steps are the same either way):
Before we get to the account creation – just a quick word about choosing your “Master Password”. Your Master Password will be the link to ALL your passwords in the future – so DO NOT use the same old password you’ve always been using!
Your new Master Password SHOULD NOT CONTAIN:
- Your nickname or initials
- The name of your child (children) or pet
- Important birthdays, anniversaries or years
- The name of your street
- Numbers from your address
- Obvious phrases like “password” or “letmein”
- Sequences like “1234”
- Keyboard patterns like “qwerty” or “qazwsx”
The best (most secure) passwords are ones that are long and contain numbers and special characters or are just simply 4-6 completely random words (they are the hardest for hackers to guess). This is illustrated in a most excellent way by xkcd:

So – DO NOT USE “correcthorsebatterystaple” as your password – but pick random words (NOT common phrases) – or use the first letter of each word in a quote or song lyric:
- 2BorNot2B_ThatIsThe? (To be or not to be, that is the question – from Shakespeare)
- 4Score&7yrsAgo (Four score and seven years ago – from the Gettysburg Address)
- Pwrd4Acct-$$ (Password for account at the bank)
- Pwrd4Acct-Fb (Password for a Facebook account)
- WOO!TPwontSB (Woohoo! The Packers won the Super Bowl! )
- C?U2canCRE8Pwords;-) (See? You too can create passwords
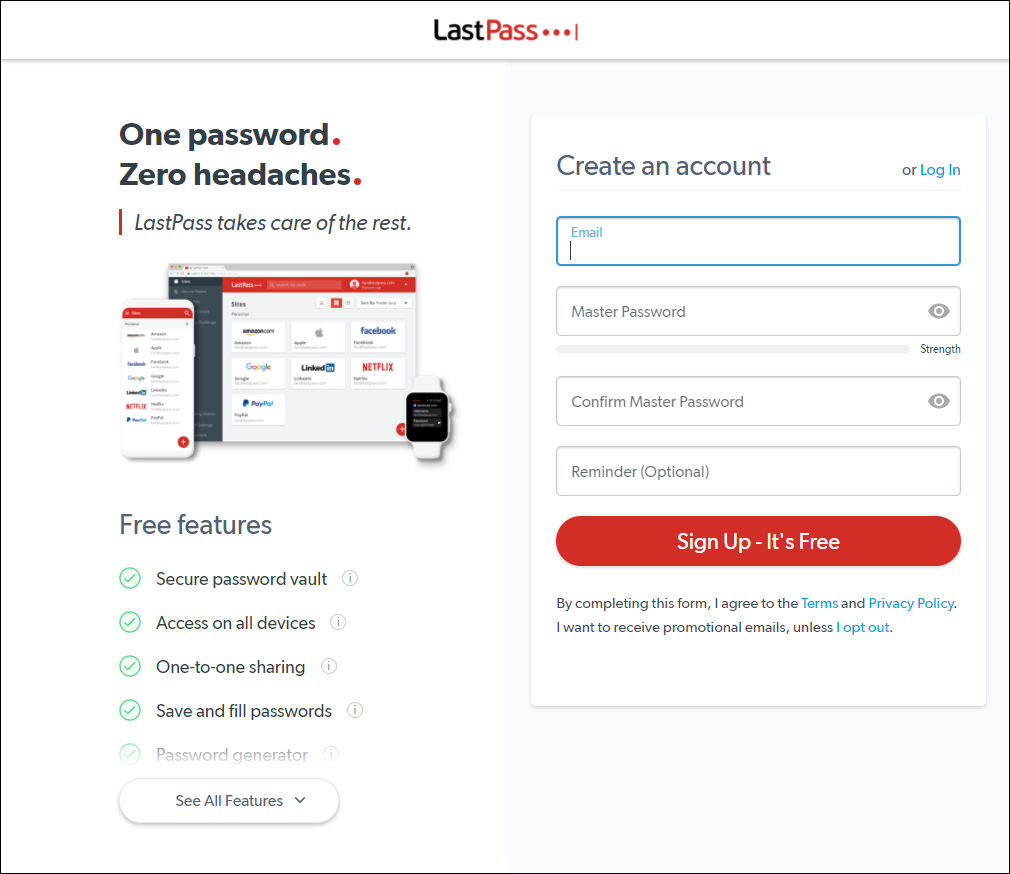
OK – now back to our tutorial… enter your email, your strong master password and sign up:
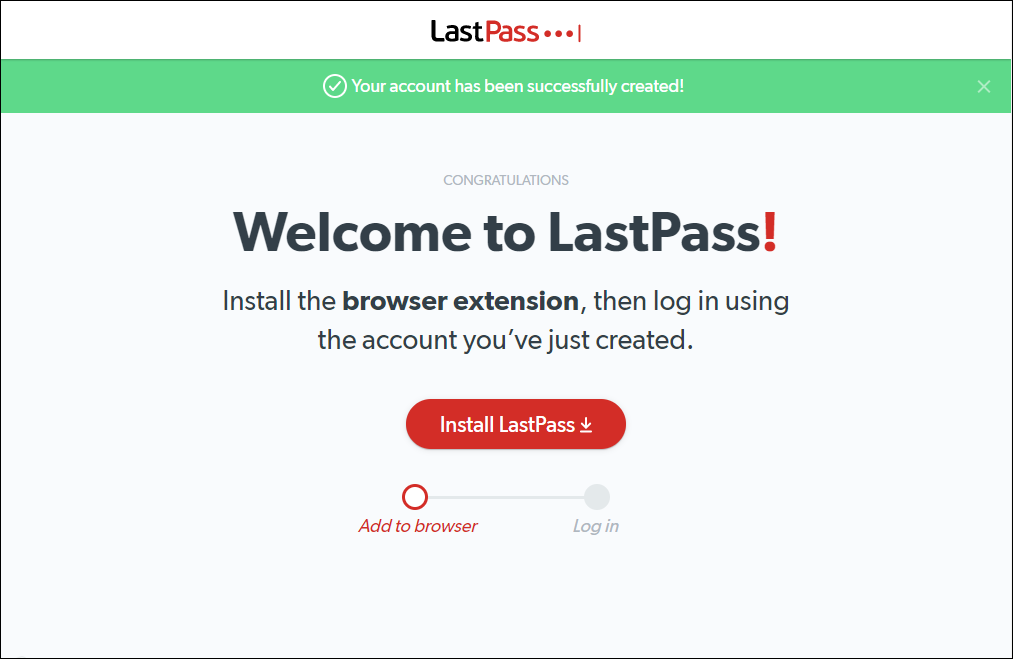
It will only take a couple of seconds – and then you’ll see a “success” message:
WARNING – Depending on your browser settings – you may see a dialog asking if you want to save your password – something like this:
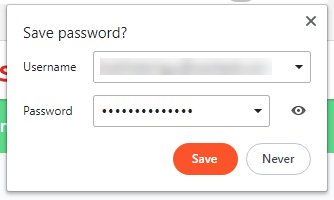
CLICK “Never” ! The reason is – this master password would be stored in the browser – and that’s not 100% secure. If the bad guys got this master password – they would have access to all of your passwords!
Step 2 – Install the Browser Extension
Next – click the red “Install LastPass” button to install the browser extension. Depending on what browser you’re using (I’m using the Brave browser in this example) – you will be redirected to the correct place to download extensions. In my case it’s the Google Store:
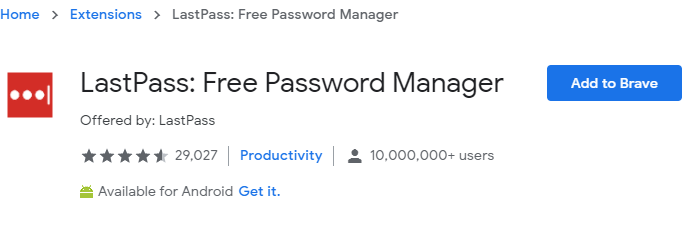
Click the button to install the browser extension – and after a few seconds you’ll see a little black icon in the tool bar:
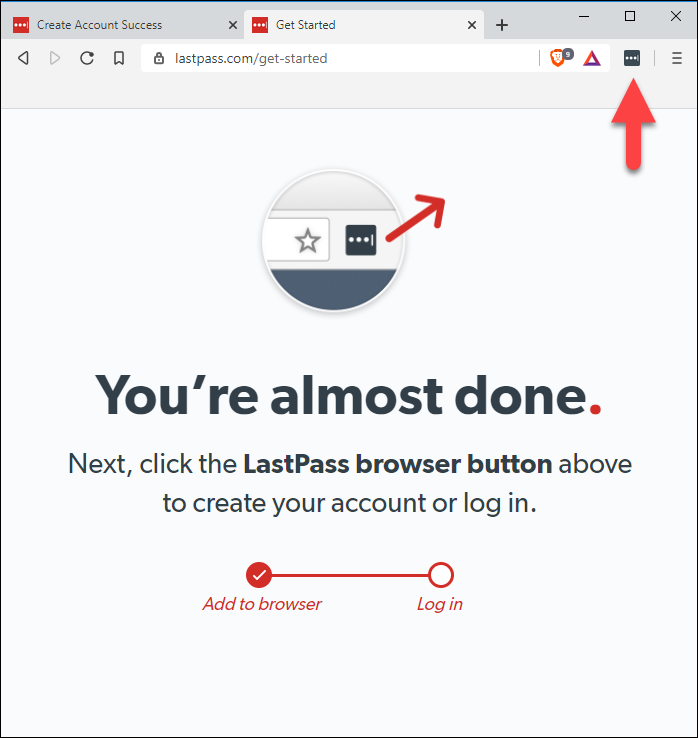
Click the black button (this means that you’re not logged in to LastPass) – and you’ll be prompted to enter your email address and Master Password:
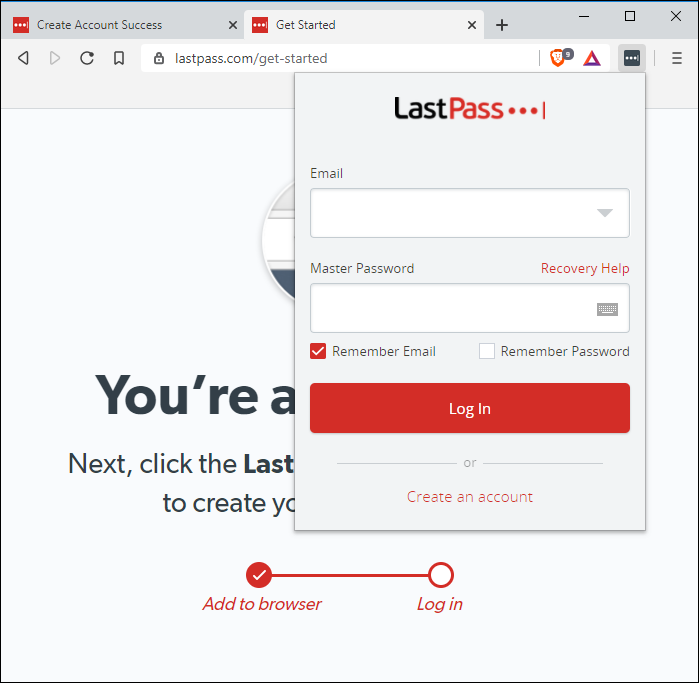
You will be then asked if you want to set up your first password. If you WANT TO – go ahead and pick one of the accounts.
I’ll show you how to do it manually (if you click the “Remind Me Later” link):
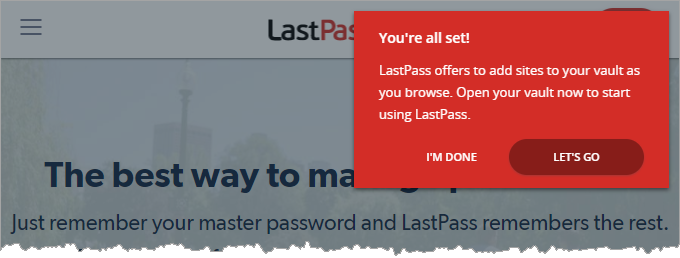
Click the “Let’s Go” button and you’ll see your password “Vault”:
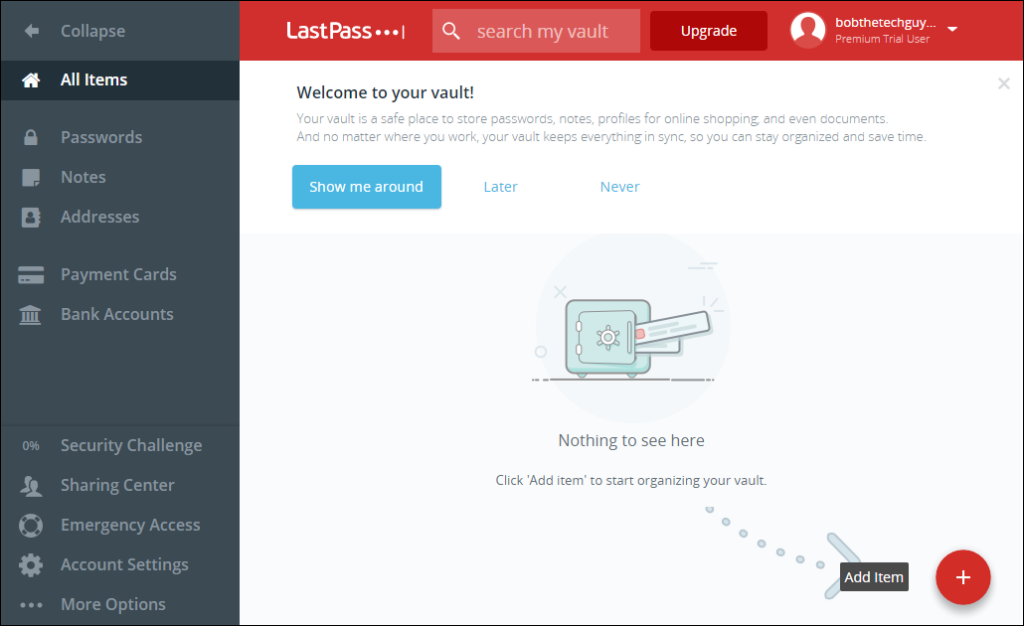
Now, you can click the big red “+” to manually add a site and password:
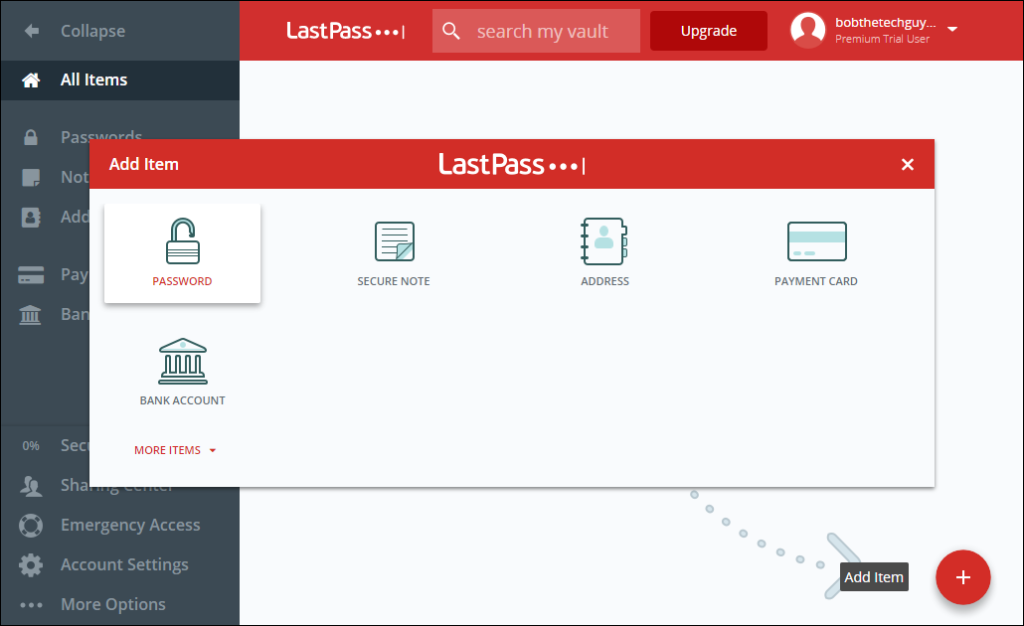
But I think it’s much easier to just let LastPass do the work for me.
Step 3 – Start Storing Passwords
For this example, I’m going to add my Facebook account. So, I go to Facebook.com and I LOG OUT. NOTE the little black icon in the user name and password field. That’s how you can access the LastPass username and password for this site.

Since I haven’t saved one yet – I’ll enter my normal user name and password and login. As soon as I’m logged in – LastPass will prompt me to save the login information:
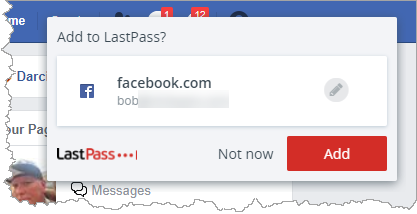
Click the “Add” button – and then you can see it’s been added to your vault. Just click the red LastPass icon in the top bar and choose “Open My Vault”:
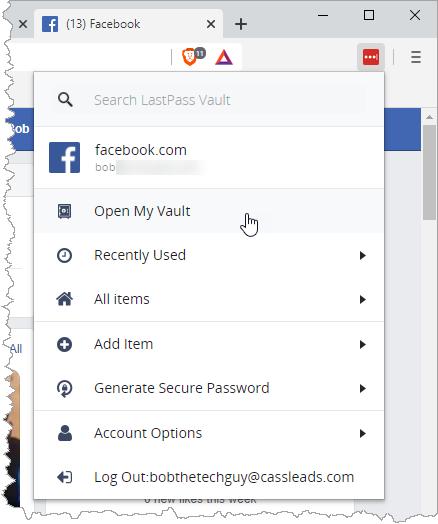
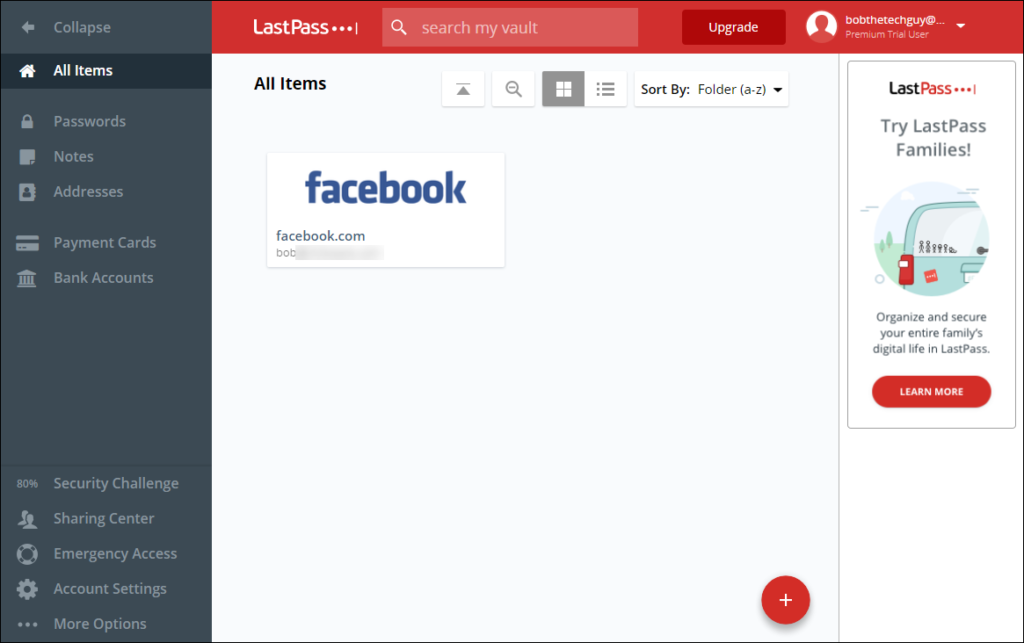
Pretty easy, huh?
Step 4 – Change Your Crappy Old Password
Now that you’ve made it this far – you can FINALLY replace your old, crappy password with a new, random, secure password (that LastPass will automatically generate).
You will be doing this in each site you log in to – and the procedure for changing your password will vary from site to site. I’ll walk you through how to do it Facebook – and other sites will be similar.
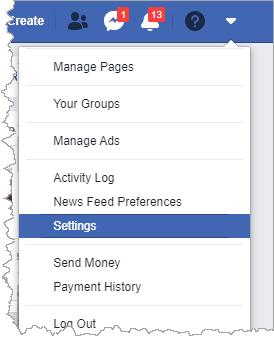
Log in to Facebook and choose “Settings” from the triangle icon on the top right:
Click “Security and Login” in the upper left and then click the “Edit” button next to “Change password”:
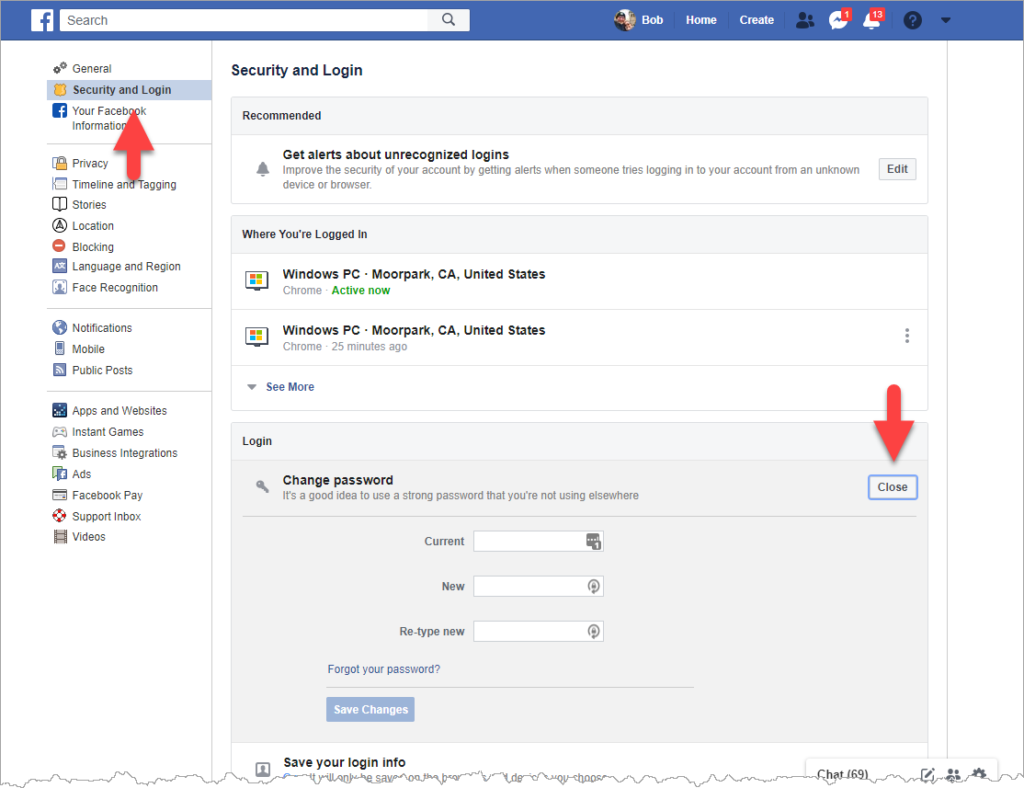
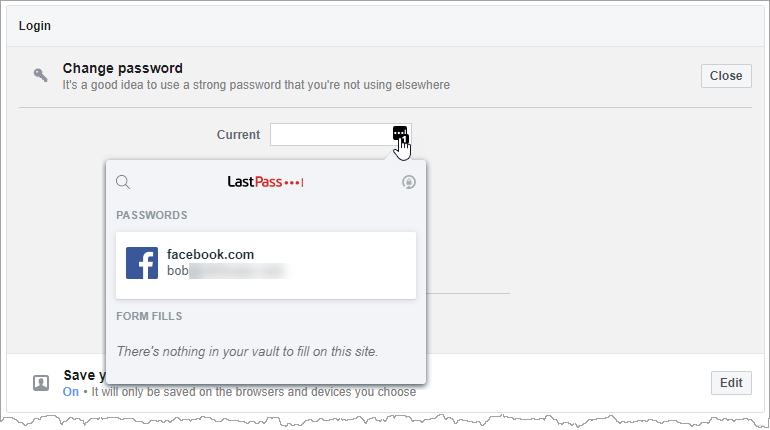
You can let LastPass fill out your current password by clicking the icon in the “Current” text box:
Now, we’ll let LastPass generate a new, secure password for us. Click the little circle in the “New” textbox:
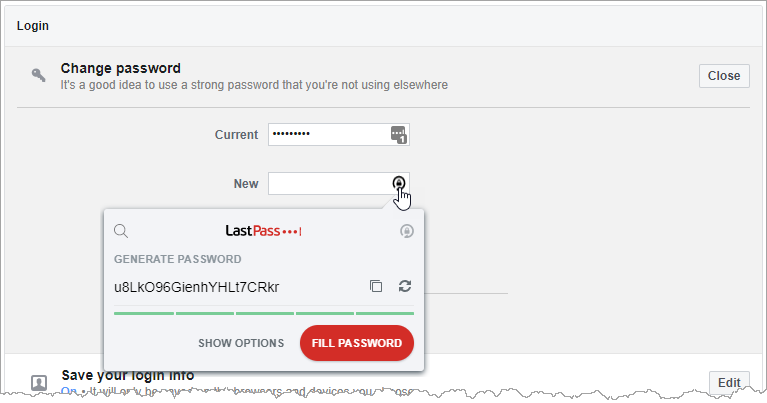
Click the “Show Options” link next to “Fill Password” – so you can specify options for the password:
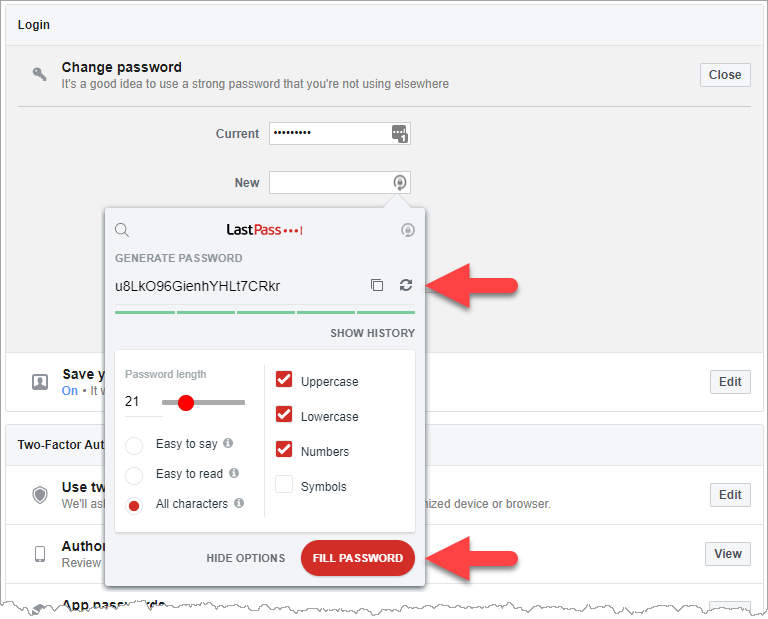
In this example, I’ve chosen a password that’s 21 characters long and uses uppercase, lowercase and symbols. You can re-generate the password by clicking the circular icon to the right of the password, and you can copy it by clicking the double-pages icon to the left of the double circles.
Once you have a password that looks good to you – click the red “Fill Password” button. LastPass will automatically put the password in both fields – and ask if you want to update the password:
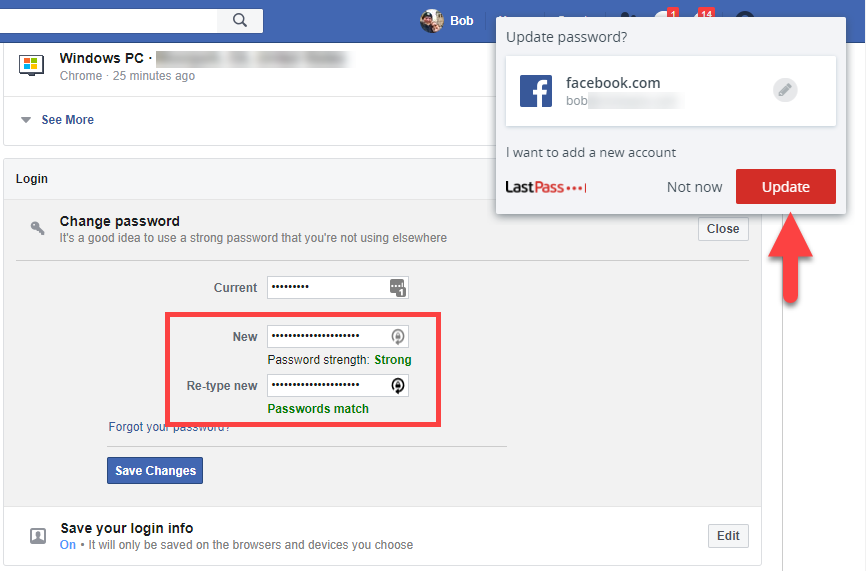
Click the red “Update” button so that LastPass will store the new password, then click the blue “Save Changes” button. In a few minutes, you’ll receive an email from Facebook telling you that your password was updated.
Follow this same basic procedure for each of the sites that you’ve logged in to.
If you can’t remember, here’s a good way to see where you’ve logged in – and you’ve set up your browser to automatically save your passwords – browse the list of saved passwords. This will tell you places you’ve logged in before.
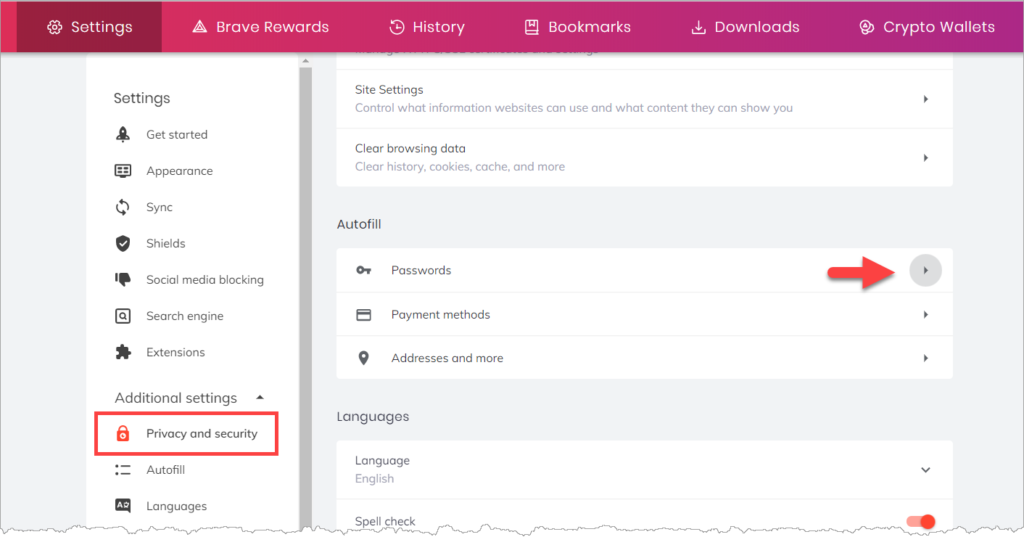
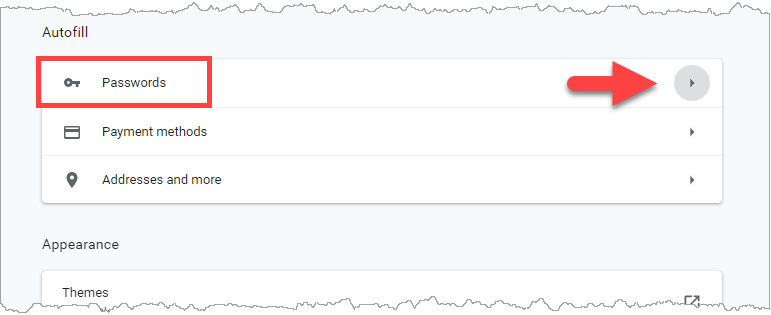
In Brave and Chrome – click on the hamburger menu (three horizontal lines) in the upper right and choose “Settings”. The saved passwords are in the “Autofill” section:
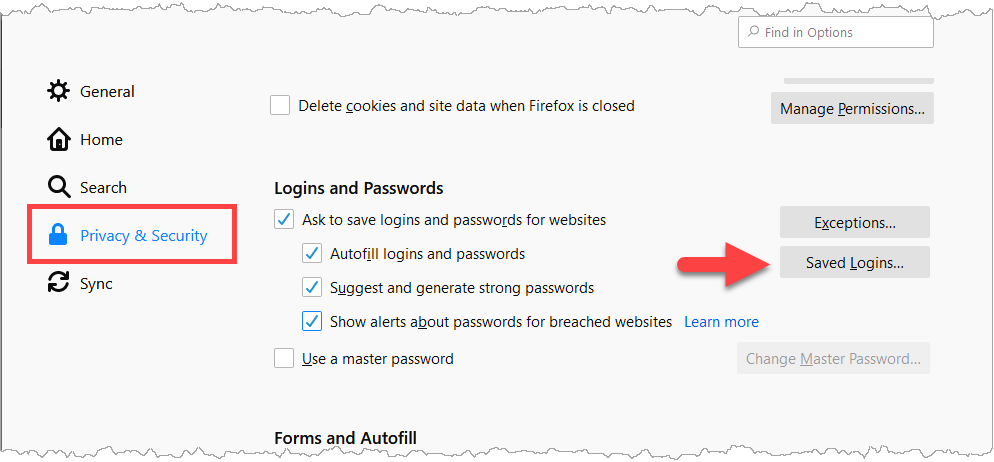
In Firefox choose “Options” from the hamburger menu in the upper right, then click “Privacy & Security” on the left and click the “Saved Logins…” button:
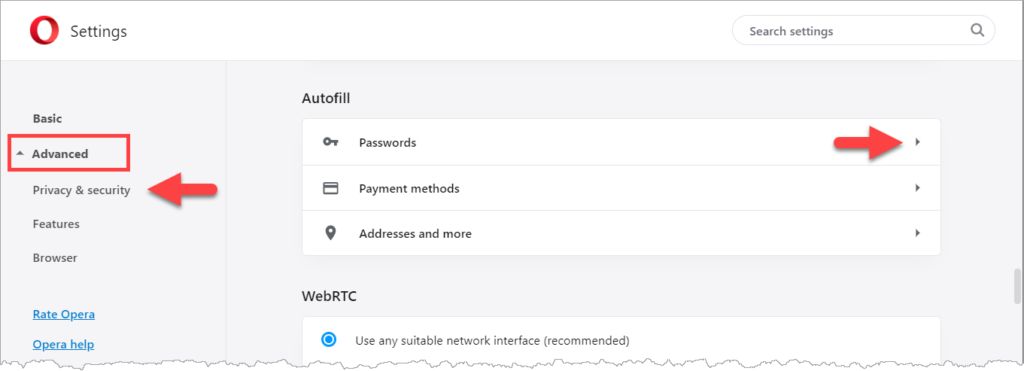
In Opera click the red “O” in the upper left and choose “Settings”, click “Advanced” on the left to show the “Privacy & security” link, then click the arrow next to “Passwords”:
This should show you a list of all the place you’ve logged in to (and saved the passwords for):
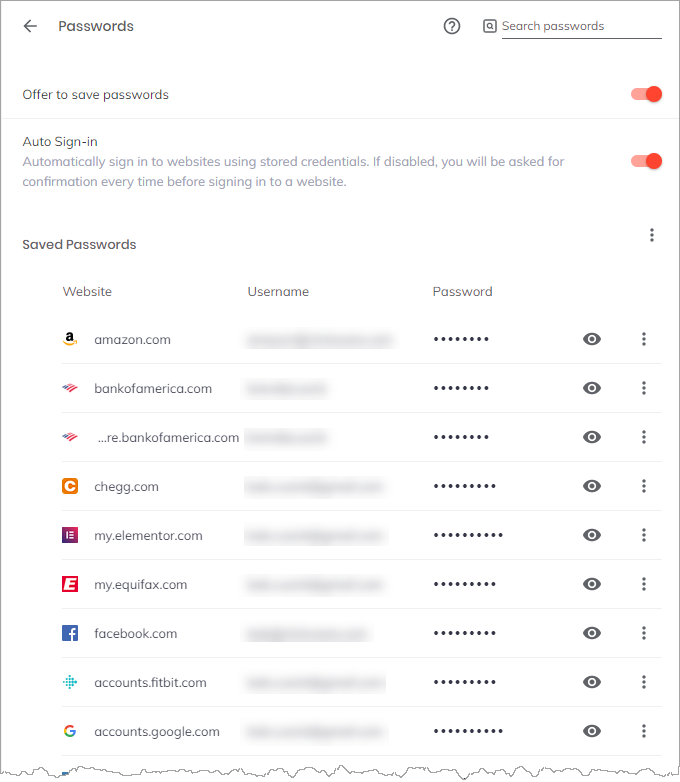
If you plan on logging into these sites again, it’s a good idea to log into each one, then change your password to one that LastPass generates for you (like we did for Facebook in the example above).
You DO NOT have to do all of them at once! Don’t feel overwhelmed – just add a password to your password manager the next time you log into a new account. This breaks the process up into more manageable chunks.
TIP FOR WINDOWS BRAVE OR CHROME USERS
(who are also fairly technically literate):
You can have LastPass import all the saved passwords for you. Click on your LastPass extension icon and choose “Account Options -> Advanced -> Import -> Google Chrome Import Manager. You can download a sideloader that will allow you to harvest the saved sites and passwords and will automatically put them in your vault.Now, this may be something that sounds better than it actually is – because you still need to go to each individual site and change your password – and you may (like me) have something like 400+ sites you’ve logged in to over the years – so it may be easier to do them one-by-one over time.
Once you have updated all your logins – go back into your browser settings and TURN OFF the option of having the browser save passwords for you and TURN OFF the option of auto-sign in (also called “auto-filling” in some browsers):

This will keep you from going crazy with the browser trying to drop down a menu in front of the LastPass dropdown! (If you’re really paranoid you can also DELETE all the saved passwords!)
Once you have some passwords updated and saved in LastPass, you can organize them by folder, and if you sign up for the family plan, you can invite up to 6 family members:
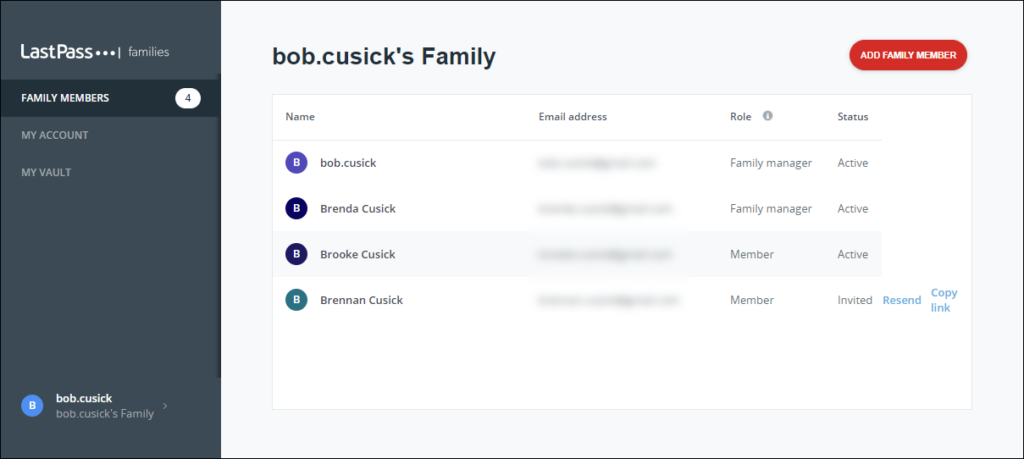
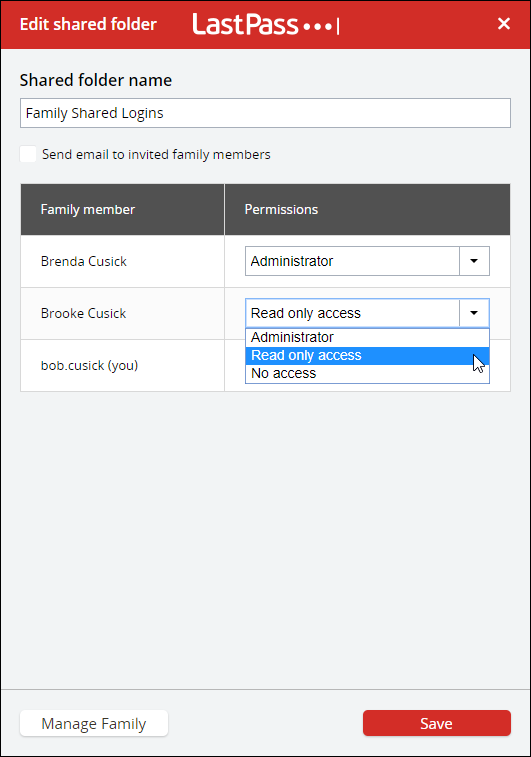
Each family member gets their own account and you can set up shared folders of logins that everyone uses (your Amazon account, Netflix, Hulu, etc) – and assign permissions to each family member:
The best time to start getting your passwords secure is TODAY. Don’t put it off any longer!


